- Sep 23, 2025
- Skincare Tips
- 992
Share this post on:
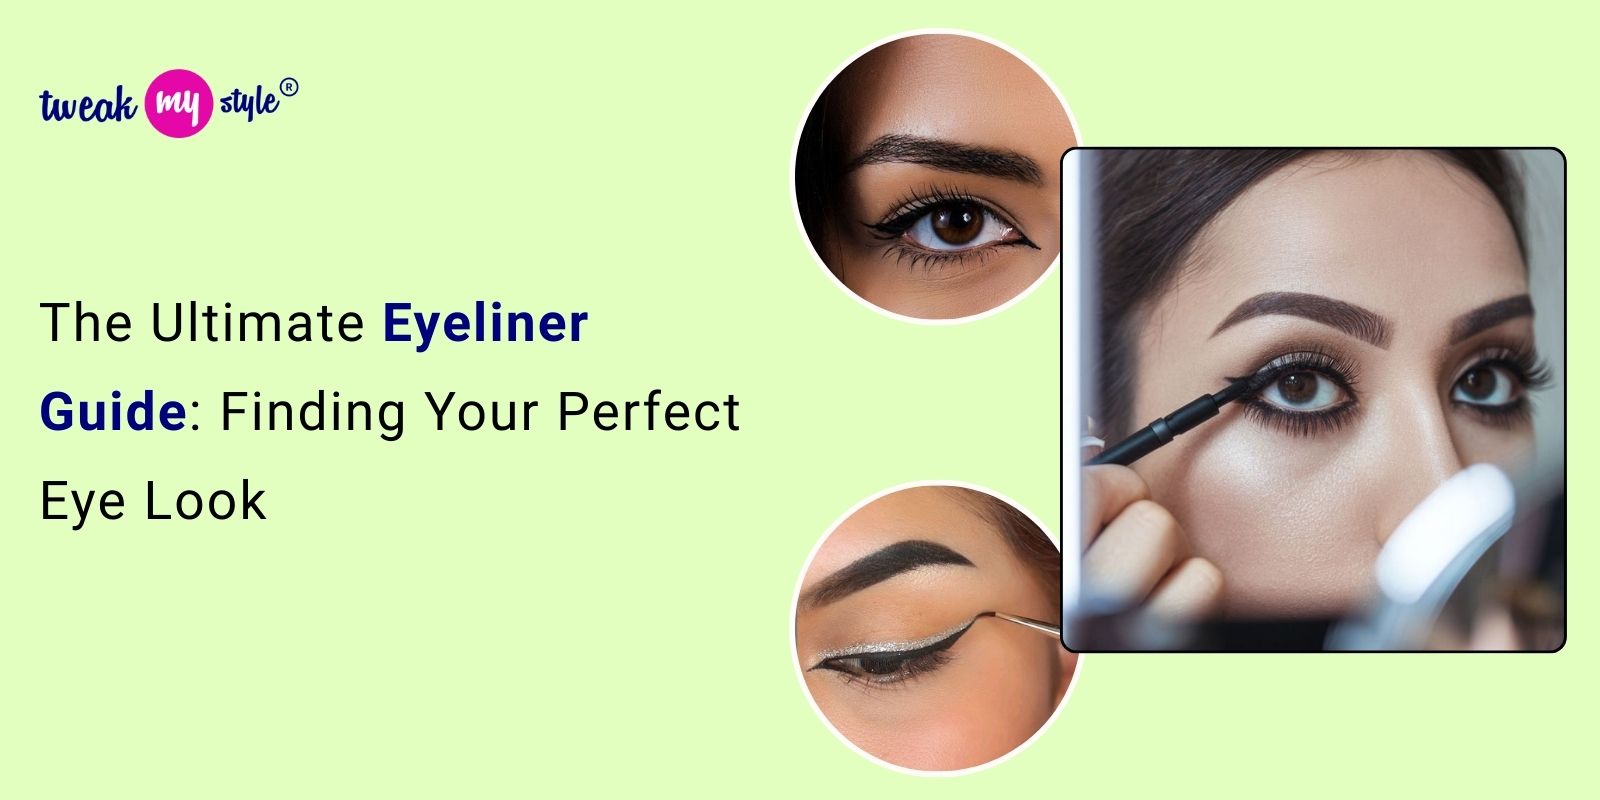
Eyeliner. The mere word can send a shiver of panic down the spines of many makeup enthusiasts. It’s often perceived as intimidating, a weapon of potential mistakes, and a commitment to a particular aesthetic. But the truth is, eyeliner is a transformative tool – one that, when understood and wielded correctly, can dramatically enhance your eyes, frame your face, and elevate your entire look. This guide isn't about forcing you into a specific style, it’s about empowering you to discover your perfect eye look through understanding the different types, techniques, and considerations that make all the difference.
Why Eyeliner Matters – More Than Just a Line
Before we dive into the specifics, let’s address why eyeliner is such a powerful makeup staple. It’s not just about drawing a line. Eyeliner does several crucial things:
- Defines the Eye: It adds depth, shape, and definition, making your eyes appear larger, more awake, and more expressive.
- Frames the Eye: A well-placed line can highlight your eye shape and bring out the best features.
- Creates a Dramatic Effect: From subtle enhancement to bold, graphic looks, eyeliner is the foundation for a truly captivating gaze.
- Adds Dimension: Layering eyeliner creates shadows and highlights, mimicking the natural shadows and depth of your eyes.
Understanding Your Eye Shape – The Key to Success
This is arguably the most important factor. Trying to apply eyeliner to an eye shape that doesn't suit the technique will inevitably lead to frustration. Here's a breakdown of common eye shapes and the best eyeliner approaches:
- Hooded Eyes: This is the most common eye shape. The eyelid folds down, partially covering the eyelid when the eye is open.
- Technique: Winged eyeliner is challenging but achievable. The key is to extend the line beyond the outer corner of the eye, following the natural curve of the lower lash line. Avoid creating a sharp, defined wing; instead, opt for a softer, more diffused wing. Gel liner or a felt-tip pen are generally easier to control.
- Downturned Eyes: The outer corner of the eye dips downwards.
- Technique: Lifted eyeliner is crucial. Apply a thicker line along the upper lash line, extending upwards and outwards slightly. A slightly thicker line on the outer half of the lash line creates a lifting effect, balancing the eye shape. A small wing can also help to lift the eye.
- Upturned Eyes: The outer corner of the eye is raised.
- Technique: This eye shape is generally considered the most "flattering" for makeup. A classic winged eyeliner works beautifully, emphasizing the lift. Don't be afraid to create a more dramatic wing.
- Close-Set Eyes: The inner corners of the eyes are close together.
- Technique: Extend the wing outwards significantly to create the illusion of wider-set eyes. Focus on extending the line further than you normally would.
- Wide-Set Eyes: The space between the eyes is large.
- Technique: A more subtle approach is best. Avoid extending the wing excessively. Instead, focus on defining the lash line and creating a slightly softer wing.
- Almond Eyes: These are considered the "ideal" shape, offering versatility with eyeliner. You can experiment with various techniques, from subtle definition to dramatic wings.
Types of Eyeliner – Choosing Your Weapon
The market is flooded with eyeliner options. Here’s a breakdown of the most popular types:
- Liquid Eyeliner: Known for its intense pigmentation and precise lines. It’s a fantastic choice for beginners who want a sharp, defined look. However, it can be the trickiest to master. Felt-tip or brush-tip liquid liners offer the most control.
- Gel Eyeliner: A classic for a reason. Gel liners come in a huge range of colors and are incredibly versatile. They can be applied with a brush or a small angled brush, allowing for detailed application. They build up in opacity, so start with a small amount and build up gradually.
- Pencil Eyeliner: The easiest to use, especially for beginners. Perfect for smudging and creating a softer, more casual look. Great for blending and creating a subtle definition.
- Felt-Tip Eyeliner: A hybrid between liquid and pencil. Offers good pigmentation and precision while remaining relatively easy to control.
- Waterproof Eyeliner: A must-have for anyone prone to watery eyes or those wanting a long-lasting look.
Eyeliner Techniques – Mastering the Art
- The Basic Wing: This is the cornerstone of many eye looks. Start with a small flick upwards from the outer corner of your eye. The angle of the flick is key – it should follow the natural curve of your lower lash line.
- Tightlining: Applying eyeliner to the upper waterline (the skin under your upper lashes) creates a subtle, lifted effect. Be gentle!
- Smudged Eyeliner: Use a small brush or cotton swab to soften the edges of a gel or pencil liner for a smoky, diffused look.
- Floating Eyeliner: This technique involves starting the wing from the outer corner and letting it "float" outwards as you apply the liner. It creates a softer, more organic wing.
Tools You'll Need
- Eyeliner: (Obviously!) Choose one based on your experience level and desired look.
- Mirror: A magnifying mirror is incredibly helpful, especially when starting out.
- Makeup Brushes: A small, angled brush for gel liner, a cotton swab, or a spoolie (for blending).
- Makeup Remover: Essential for cleaning up mistakes.
Final Thoughts & Tips
- Practice Makes Perfect: Don’t get discouraged if your first attempts aren’t perfect. Eyeliner takes practice.
- Start Small: Begin with a small amount of product and build up gradually.
- Clean Up: Always use makeup remover to clean up any smudges or mistakes.
- Experiment: Don’t be afraid to try different techniques and styles until you find what works best for you.
Ultimately, finding your perfect eye look with eyeliner is a journey of experimentation and self-discovery. With the right knowledge and practice, you'll be able to create a stunning eye look that complements your features and expresses your unique style.